Skip to content Skip to navigation menu
Basket
0
Main_header_image-Scandi-Concreteting.png
Add texture to your space with these clean, minimalist, easy to make candle holders.
Otherimage1-Scandi-Concreteting.png
Home accessories

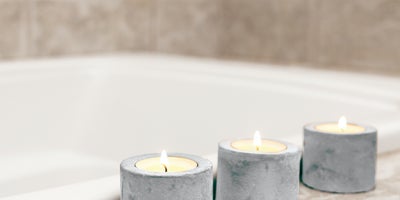
A big part of the Scandinavian design trend is the use of natural materials and textures, as well as simplicity and clean lines. Something that ticks all these boxes is concrete. It looks right at home in any application in a Scandi design environment, whether it’s the walls, the floors or something smaller and more subtle like a stool or a plant pot. Something you can do at home to create some Scandi-style home accessories is make your very own concrete candle holders. They look really clean and minimalist, but still give you the option to add some splashes of colour if you want them to play well with other aspects of the room.

Otherimage2-Scandi-Concreteting.png
What you'll need

It’s a fairly straightforward project but there are a few things you’ll need; some concrete mix most importantly, some silicone moulds, some disposable pots that you can use for mixing, something to stir the mix with, some water and any sort of colouring if you want to use it. It goes without saying that using concrete is usually a messy job, even on a smaller scale like this, so you’ll want to wear an apron or at the very least some old clothes. You’ll also need a dust mask and gloves.

Otherimage3-Scandi-Concreteting.png
Mix your concrete

he first thing you’ll want to do is get your concrete mixed. Obviously you’d normally use a tray or a bucket to do this, but as you’re only working with small quantities you’ll need to find something smaller. Any disposable pot will do, whether it’s a plastic cup or an old cleaned-out yoghurt tub. It just needs to be something that you can easily get rid of after. Follow the instructions of your mix and add water as it tells you, then give it a good mix using a spoon or stirrer. Again, ideally something disposable. If you want to add a colour, do two pots-one with the original mix and one with your added colourant.

Otherimage4-Scandi-Concreteting.png
Pour into your mould

Now that your concrete is ready, you can pour it into your mould. If you’re just going for the natural look of the concrete, then just pop it straight in there. If you’re adding colour there’s a little more to it. If you want your colour to mix in with the concrete, you can just pour it on top straight after. If you’d rather keep them separate and have 2 clearly defined layers, then let the white dry before you add your colour mix. Once you’ve poured all your mix into the mould, give it a tap to get rid of any air bubbles.

Otherimage5-Scandi-Concreteting.png
Final touches

Give it some time for your concrete to dry and set, again following the instructions. Then you can go about carefully taking them out of the mould. Once they’re out, you have your very own concrete candle holders. There’s lots of room for experimenting with these, with lots of different options for size, shape, colours and even textures. Depending on the size, they’re ideal for holding tea lights or you could possibly even make your own candles to pop in there.
More inspiration