Skip to content Skip to navigation menu
Basket
0
Planning and preparation
  • We are going to show you how to build a boot rack, step by step.
  • It provides the perfect storage space for your welly boots. 
  • This project doesn’t require too much time or experience to complete and uses materials that are all available from Wickes. 
  • It should take a DIYer with moderate experience around 2 to 3 hours to complete.
Doing it right
  • Make sure to measure the space where you wish to keep your boot rack. 
  • Measure the largest boot to be stored and the number of boots as the size can be varied to suit your needs.
  • Choose the right timber for where your rack will be placed.
  • Using wood treatment will prolong the life of your rack if it is exposed to the elements.
  • When working with exterior paint and brushes, work slowly to apply thin and even coats until you have your desired coverage.
Staying safe
  • Always make sure that your chop saw is unplugged while you’re setting it up or changing accessories, to ensure your safety.
  • Keeping the plug in-sight acts as a visual reminder to prevent accidents and hazards.
  • For extra safety when using power tools and painting, be sure to wear protective equipment, including your ear defenders, goggles and a dust mask. 

Measuring up

View instructions

Use your largest pair of wellington boots as a reference point for the size of your rack.

Measuring wellington boots
Measure the inside height of your largest boot and make a note of it .

Measure the dimensions of the space where you plan to put your boot rack.

Measuring wood with a tape

Measure and mark your timber ahead of time.

Cutting the materials

View instructions

Stack spare timber on your workbench at the same height as the bed of your chop saw, so long lengths of timber are supported when you’re cutting them.

Cutting with circular saw

Lay your scaffold board on the bed of your chop saw and clamp it into position.

Cutting wood with circular saw

Cut it to size according to your measurements, before using your new cut out to mark the measurements for two more identical cuts.

Cut two more, so that you have three in total.

Using electric sander

Go over any rough edges with an orbital sander.

Using circular saw to cut dowel

Cut dowels and go over them with your sandpaper to give them a smooth finish.

Dust pan brush sweeping up
Once your cutting is complete, give your workspace a quick tidy up before moving on to the next step .

Constructing the boot rack

View instructions
Lining up castor wheels

Hold your casters in place and use a bradawl to mark the positions of each screw.

Using cordless drill

Drill pilot holes through the indentations to make fixing the casters easier and achieving a better finish.

Drilling castor wheels
Screw the casters into the pre-drilled holes .
Marking up wood

Mark the location for the foot of your boot rack.

drilling into wood
Hold it in position and secure it with two screws, making sure to drive them below the surface of the wood. 
Drilling screws into wood
Fix the other two planks together with screws .
Lining up wood
Use the base planks as a guide for a straight edge by feeling the edges with your fingers and making sure that the three planks are sitting flush. Then using this scribe a line across the joined planks.

Placing and drilling your holes for the dowels

Measuring wood with tape measure

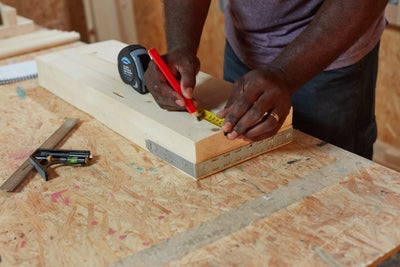
Divide your board into sections with your pencil, marking them out based on the size and shape of your boots.

Drilling wood

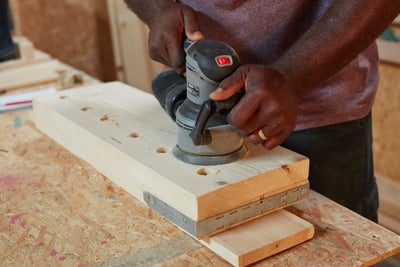
Drill pilot holes for your dowels and then drill through them with your spade bit to expand them.
Sanding wood with electric sander

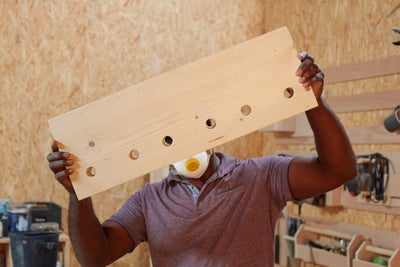
Use a sander to remove any rough edges and pencil marks, then go around the inside of the holes with sandpaper.

Checking holes in wood

Flip it over and make sure all of the edges are lined up evenly.
Drilling into wood

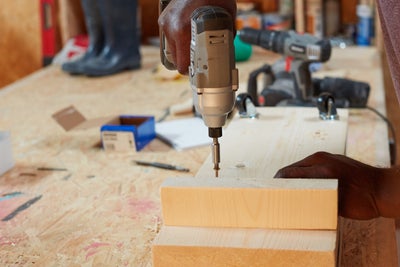
Secure the base plank to the bottom.
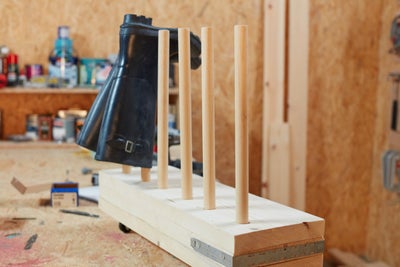
Adding your dowels

View instructions
Inserting dowels

The dowels should be a tight fit in their pre-drilled holes. If they are too tight use sandpaper to make slightly smaller.

Boot rack on wheels

Wood glue can be used if required.

Preserving and decorating

Wellington boots on bootrack

Treating or preserving wood is a good way to make sure it stays protected and lasts longer.

Applying stain or paint is a great way to give your boot rack a personal touch and helping it fit in seamlessly with its surroundings.