We are going to show you how to build custom outdoor storage, step by step.
It provides the perfect additional storage for boots, bikes and bins, protecting them from the weather, keeping them locked away securely and tucking away anything unsightly.
This custom outdoor storage is built completely to the dimensions of whatever you want to store. So, you get complete freedom when it comes to size and design.
All of the materials used are available from Wickes.
It should take a DIYer with moderate skill approximately two to three days to build.
Doing it right
Make sure to measure the available space and consider access, sightlines and location.
Choose timber that can stand up to the elements - it’s going to be exposed to rain and wind outside during the colder months.
When working with exterior paint and brushes, work slowly to apply thin and even coats until you have your desired coverage.
Staying safe
Always make sure that your chop saw is unplugged while you’re setting it up or changing accessories, to ensure your safety.
Keeping the plug in-sight acts as a visual reminder to prevent accidents and hazards.
For extra safety when using power tools and painting, be sure to wear protective equipment, including your ear defenders, goggles and a dust mask.
Measuring up
View instructions
Measure the depth, height and width of the bin or bins you plan to store in your custom outdoor storage.
Measure the height and length of your bike, or consider how much space you’d require if you plan to store multiple bikes.
Make sure to give yourself some extra space on all of your measurements. This helps you make sure the storage area isn’t too tight and makes it easier to accommodate your items.
If including your boot stand, make sure to measure its depth, height and width as well.
Deciding your design
View instructions
We built the entire store in our workshop, but it’s designed to be moved to your desired location before the final construction takes place. This allows you to easily transport it in pieces, rather than as a whole unit.
Take plenty of time to create a design that suits the space you’re working in.
This build guide will give you the principles of building the store, but the project itself is completely bespoke.
Our design includes a sloping roof- if you wish to have a sloping roof, you’ll need to calculate the pitch of your roof based on your measurements.
This angle is key when constructing your frame, as it provides a reference for all of your angled cuts.
Cutting timber and calculating the roof angle
View instructions
Once you have your measurements and your design, cut your timber and cladding to size.
Make sure you support the ends of longer lengths when cutting them.
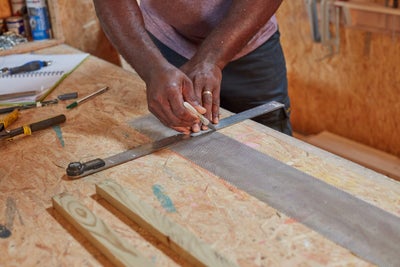
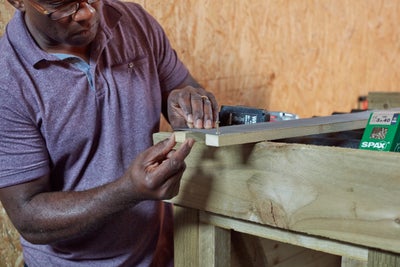
There are a couple of methods you could use to mark the angle on your lengths. We opted for a digital adjustable square
.
With your digital adjustable square, loosen the saw bed and change the angle to match before locking it into the new positio
n.
Now you can make your angled cuts according to your measurements.
Framing up
View instructions
Smooth out any rough edges by going over any feathered cuts with sandpaper.
Dry lay your frames one at a time, placing them in position.
Drill pilot holes for your butt joints, then affix them with screws
.
Butt join the frames together to form the roof.
Cladding
View instructions
We recommend doing this on a firm surface, such as an even floor.
Check that everything is straight and square before you start nailing the cladding into the frame.
Starting from the bottom, nail in the cladding across the fram
e.
We used tongue and groove, but it’s up to you when it comes to the cladding you use.
Once you get to the end, you’ll need to use your judgement to work out the best places for your final nails
.
Lift the frame onto your workbench and trim away any overhang.
Flip the frame over and go over it with sandpaper, before repeating these steps for all remaining sides.
Adding diagonal frame
View instructions
Assuming your workbench is square, clamp your frame to the workbench in one corner and use it to make sure the corners are sitting at 90°.
Lay the diagonal piece across your frame and mark the angles.
Angle your chop saw accordingly and cut it to size.
Then clamp and screw it into plac
e.
Putting it together
View instructions
Clamp your fence posts into position on the cladded side panel.