Skip to content Skip to navigation menu
Basket
0

Planning & preparation

  • We are going to show you how to paint pour a coffee table step by step.
  • Paint pouring is a great way to revive and upcycle an otherwise unloved or tired piece of furniture, transforming your interior décor with a custom design. Not just for coffee tables, you can paint pour on most flat and clean surfaces, including tables, chairs, stools, canvases, coasters and ornaments.
  • This project has lots of room for creativity. Our step by step instructions have been designed as a guide to give you a range of ideas, tips and techniques to create your own poured paint project.
  • We recommend having a look online for paint pouring inspiration. This is a great way to gather colour scheme inspiration and ensure you have everything you need to hand before you begin this project.
  • We used a selection of left-over coloured gloss paints for a fun and high shine finish, but you can experiment with colour schemes and paint finishes for a different look.
  • The materials for this project will cost around £30 depending on the size of your project and what you already have to hand. If you purchase materials for this project, you may find that you have left-over paint that can be used on other projects.
  • This project will take a DIYer with moderate experience approximately 1 hour to complete, however, to ensure the paint has sufficient time to dry we recommend setting aside a minimum of 72 hours. For a solid cure, your project may need between two and four weeks to completely dry.

Doing it right

  • The beauty of this project is in the experimentation as there is no one right way to pour paint. This guide includes a number of techniques, tips and advice for creating your own designs.
  • The smoother the surface, the better the pour will be. Depending on the condition of your project, you may find that the surface needs some attention before you begin. If your project is already painted or has an uneven texture, give it a light sand back to smooth over the surface.
  • If you need to fill any dents or deep scratches, give the filler time to dry before sanding back the surface for an invisible and smooth fill.
  • If there are lots of superficial scratches or stains, priming can help to remedy and neutralise the surface. This will also help the paint adhere and ensure the surface is perfectly level for the best finish.
  • Give the surface of your project a good clean and wipe down with a soft cloth to remove any dust, dirt or debris.
  • Remove any fixtures and fittings that you don’t want to paint such as handles, doors, legs or a base before you begin. If they can’t be removed, use good quality decorating tape to protect them.
  • If you decide to paint the legs, base or rest of your project in a complementary or contrasting colour, plan ahead so the paint has plenty of time to dry.
  • Pouring paint is a messy job. We highly recommend that you protect the floor of your working area with dust sheets, plastic sheeting or bin liners to make cleaning up easier.
  • When you’ve finished your project, discover our top tips for storing leftover paint.
  • Your project will need some time to dry in a ventilated room after the pour. If you can, work in an open space away from foot traffic to minimise the risk of dust and dirt settling on the surface.
  • Depending on how you use your project, it can be a good idea to seal your pour with a clear sealant. This is especially useful for projects that are likely to have high usage, making them more durable and water-resistant.
  • Watch our top tip videos for our Wickes DIY skills, tips and advice.

Staying safe

  • Ensure your working area is well ventilated. Paint fumes can irritate skin and eyes, so it’s a good idea to wear protective goggles, a dust mask, old clothes and gloves during this project.
  • Always check the manufacturer’s label before applying any paints, stains or treatments.
Choosing paint

View instructions

Whether you have leftover materials or fancy a fun weekend transformation, it’s a good idea to gather the paint ahead of your project and decide on your favoured pour technique. We recommend sticking to either oil-based or water-based paints.
Oil-based paints tend to be more vividly pigmented but have a longer drying time, while water-based paints such as acrylics will dry darker and faster.

We experimented with a range of colours and think that bold and bright hues work best. We recommend using a minimum of three colours for the most interesting patterns.

The viscosity of the paint you use is really important. Too thin and it’ll run off the sides and too thick and it won’t spread. If you choose to use a paint medium, additive or thinner, ensure that you mix your paint thoroughly before you begin work.

Adding a lubricant into your paint can help cells form and reveal interesting patterns. Try experimenting with lubricants including water, oil and silicone-based products such a silicone WD-40.

Pouring techniques

View instructions

There’s no one right way to pour paint. There are many techniques and methods that you can use depending on your preferred style. Here are the three most popular pouring techniques.

1_poured_paint_pouring_techniques.jpeg

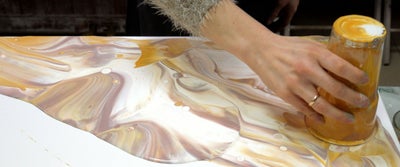
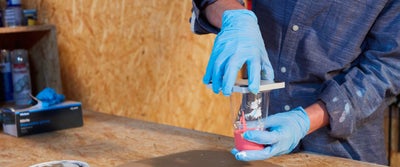
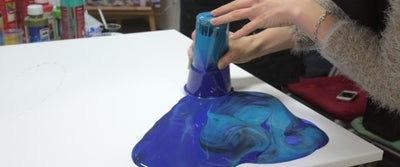
The flip cup pour: The colours are poured layer by layer into the same cup, then the cup (or surface) is flipped so the layers settle to the rim. This allows the paint layers to pool on top of one another when the cup is removed for interesting patterns and mixed colours.

2.poured_paint_pouring_techniques.jpeg

The flip and drag pour: A variation of the flip cup pour where the cup is gently dragged allowing the paint to escape and spread, rather than being removed once the layers have settled. This is a good technique for controlling the spread and working with negative space.

3._poured_paint_pouring_techniques.jpeg

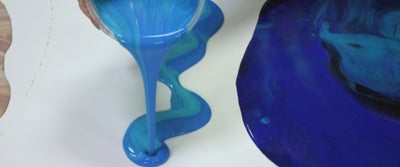
The dirty pour: Each colour is poured layer by layer into the same cup before being poured onto the surface, then tilted to spread. This is a great way to experiment with swirling colour and pattern.

4.poured_paint_pouring_techniques.jpeg

The clean pour: Each colour is poured separately, one after another onto the surface before tilting to spread. This is an easy technique for controlling the pattern and colour.

If you’re feeling adventurous or have practised paint pouring before, there are even some fun advanced techniques such a tree ring pouring and marbling to experiment with.

There are also several ways to spread the paint during the pour. The paint can be applied to the centre of the project, in a line through the centre of the surface, at random or interval points, poured in a swirling pattern or pulled and spread across the area.

Once the paint has settled, there are several ways to manipulate the patterns if there are any areas of intense block colour that you’d like to break up. This can be achieved by lightly swirling with a toothpick, gently blowing with a straw or hairdryer on a cool setting, or lightly scorching with a mini blow torch. If you have used a lubricant, this can also help bring the marbled cells to the surface.

Preparing your space

View instructions

Gather all of your materials to your workbench or working area. Once you begin the pour, you’ll want to have everything to hand to mix, top-up and spread your paint.

Paint pouring can be very messy, so it’s a good idea to protect your floor or surface from any overspill or run-through. Using an old dust sheet, tarpaulin, plastic sheeting, brown paper or bin bags will also make cleaning up a lot easier.

5.poured_paint_preparing_your_space.jpeg

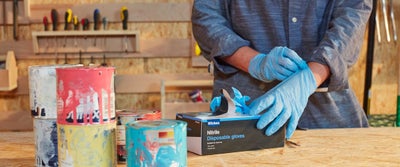
We recommend that you work in a well-ventilated space, wear old clothes that you don’t mind getting dirty and use protective gloves for this project.

Having a practice run

View instructions

Paint can be difficult and messy to remove, so we recommend doing some research and having a practice before you begin. The success of this project is in the preparation and speed that you work.

6.poured_paint_practice_run.jpeg

It’s a good idea to trial run your chosen technique on a small surface such a coaster, canvas or piece of wood. This is a good way to experiment with designs, see how the colours combine and the paint dries.

7.poured_paint_practice_run.jpeg

Practising on a small area will also give you a good idea of how much paint you need to cover the surface area.

Preparing your project

View instructions
8.poured_paint_prepping1.jpeg

We chose to paint pour on an old coffee table. While our piece of furniture was in good condition and preparation was minimal, it’s important to thoroughly prepare for the best results.
The surface of your project needs to be as smooth as possible for the most successful pour. If your project is in particularly poor condition, it can be a good idea to prime the surface. This will help the paint adhere while levelling any uneven textures.
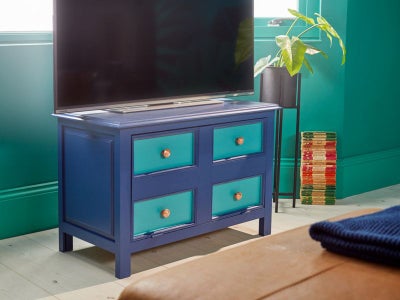
9.poured_paint_prepping.jpeg

If the surface of your piece is rough or has flaking paint, you may choose to give it a gentle sand back. If you need to fill any scratches or cracks, make sure the filler is completely dry before you sand.
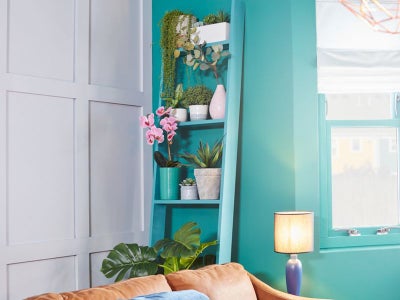
If you would like to paint the remainder of your project in clashing or complementary colours, now is the time to do so. Just ensure the surface is dry before you attempt the pour, to prevent the paint from peeling.

10.poured_paint_prepping.jpeg

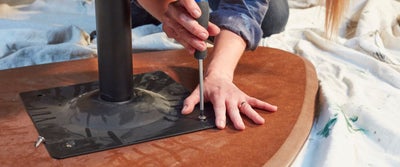
To protect the rest of the project from paint over-run, we recommend removing the base, legs or any other removable features. Ensure you set any screws aside to reattach later. If the base of your piece cannot be removed, we recommend using masking tape for added protection.

11.Paint_pouring_prep_on_coffee_table.jpeg

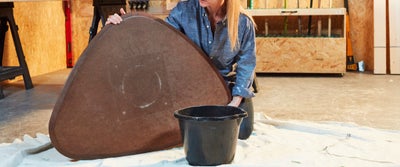
If the underside of your piece is smooth, you may find that tilting the paint can be difficult as there is very little surface area to balance or grip on to. This may result in fingerprints or marks on the sides of your project where the paint waterfalls as it spreads. While this can be fixed, it can be a good idea to fix a couple of board pins, tacks or screws to the underside to give you something to grip. If you are working with a large or unusually shaped piece, you could even temporarily screw shallow handles to the underside.

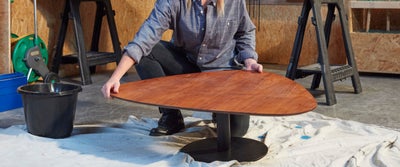
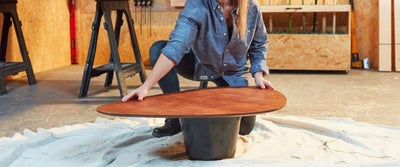
To allow the paint to spread and waterfall over the edges, your project will need to be elevated if the base or legs have been removed. We used a large wide bucket but anything solid with a smaller diameter will also work.

12.Coffee_table_paint_pour_prep.jpeg

Ensure the piece is resting securely as it will be difficult to move when wet. You may even choose to use a spirit level to double-check that the surface is level before you begin.

13.Cleaning_coffee_table.jpeg

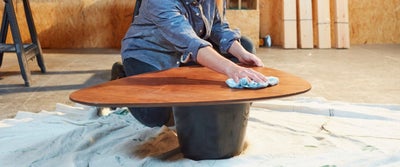
It’s also important to ensure that your project is clean and free of any dust or grime, as this can show up in the surface of paint as it dries. Give everything a good clean and wipe down with a damp cloth and allow to dry.

Preparing the paint

View instructions
14.Preparing_paint_pots.jpeg

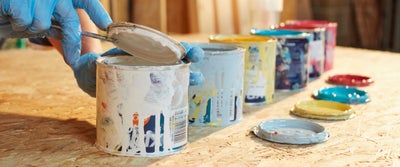
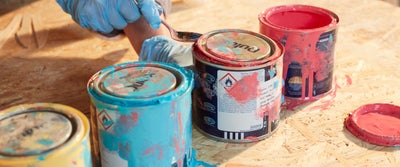
Begin by opening the tins of your chosen colours. We recommend using a paint tin opener, as this tool helps to prevent the seal from breaking, so it can be firmly closed later on.

15.Preparing_paint_pots.jpeg

If you don’t have a tin opener to hand, you can also use a teaspoon. For perfect opening leverage, place the tip of the handle or bowl between the lid and lip of the tin and gently prise open.

16.Preparing_paint_pots.jpeg

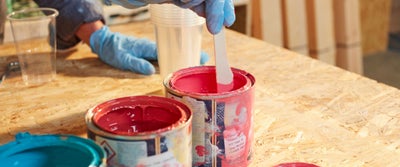
Once your paint is open, give each tin a good stir. If you are using a thinning medium, make sure it’s well combined with the paint.

17.Prepating_paint_pots.jpeg

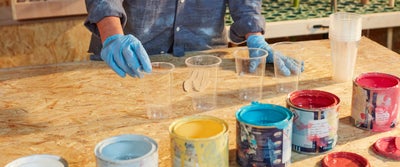
Now arrange your clean cups or small containers on your workbench.

18.Pouring_paint_into_cup.jpeg

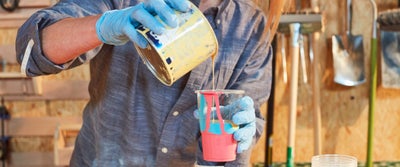
As a general rule, the first colour you add will be the last to pour and therefore the most intense. Begin by layering your first cup. Using your paint scheme, add a small layer at a time, layering each cup in a different order and with varying amounts for different effects.

19.Pouring_paint_into_cup.jpeg

We chose to work with six colours in four cups, filling each between half and three-quarters of the way. To ensure you have good coverage, you’ll want to err on the side of having more paint than not enough.

If you choose to include a lubricant to your mix, try adding a drop between layers or a few drops on top of the cup.

Pouring the paint

View instructions
20.Paint_pouring_pouring_the_paint.jpeg

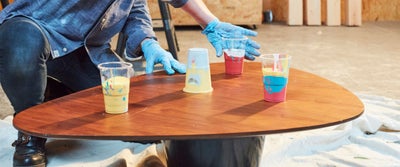
Now it’s time to begin the pour. We decided to go with the flip method, spreading our paint with several different techniques.

21.Poured_paint_pouring_the_paint.jpeg

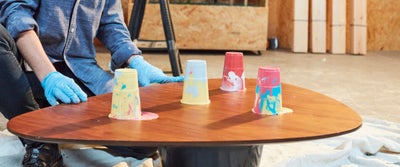
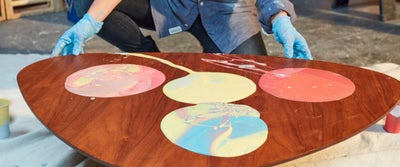
Placing the cups in position on the surface, quickly flip each over allowing the paint layers to settle to the rim. If you use this method, don’t worry if any paint escapes or smears as you flip the cups, as this will only add to the charm.

22.Paintpouring_on_table.jpeg

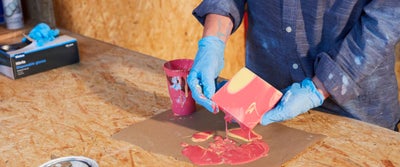
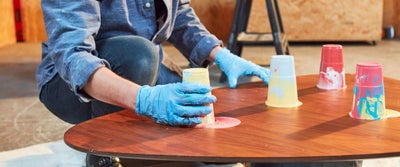
After a minute or so, it’s time to remove the cups. We removed two of the cups with a swift motion, causing the paint layers to rush resulting in swirling patterns as it spread.

We removed the other two cups slowly, dragging them slightly to spread the paint to the edge of the table top, creating a larger block of intense colour.

23.Paintpouring_on_table.jpeg

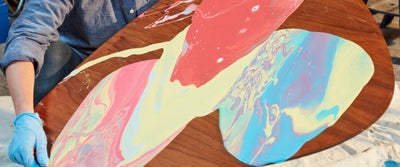
Once the cups are removed and the paint has pooled nicely, you can begin the tilting process to spread the colour across the surface.

24.Paintppouring_coffee_table.jpeg

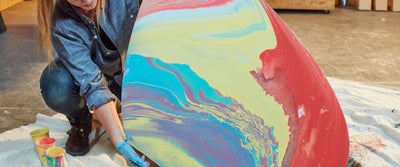
Tilt the surface in one direction, so the colour begins to run. Don’t worry if the paint runs off the side of your surface. This is the desired effect and will ensure that the paint waterfalls and covers the edges well.

25.Paintpouring_coffee_table.jpeg

Now slowly rotate the surface so the paint can spread to each edge. This is where having a textured grip under the surface can come in handy.

26.Paint_pouring_coffee_table.jpeg

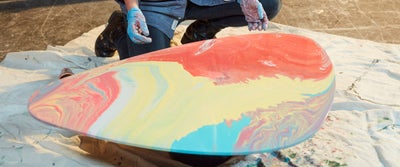
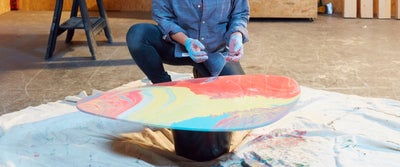
Once you are happy with the spread of paint across the surface, gently place the piece centrally back on top of your support or workbench.

Patching up and other effects

View instructions

At this stage, you may decide to go back in with more pouring to add another dimension, break up any block colour or cover any areas that have light finger marks.

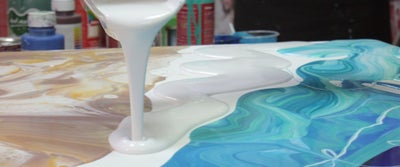
Using leftover paint from the cups or filling another with your chosen colours, simply pour a small amount at a time, to patch any areas or to add more patterns. Working quickly at this stage will ensure the paint dries evenly and smoothly with the original pour.

You can also use your gloved fingers to gently spread paint across any edges that haven’t be covered, or tools to help create further patterns in your work. A toothpick, straw, hairdryer and blow torch can all be used for varying finishes.

If you find that some paint has splashed or dripped onto the legs, base or fittings of your project, dip a cloth in a little white spirit or water to gently rub away.

27.Paint_pouring_coffee_table.jpeg

When you’re happy with the finish, leave your pour to dry on its elevated base in a well-ventilated space. The paint will be touch dry and tacky after a couple of days, but we recommend leaving the piece for a minimum of two weeks for a really solid cure.

Depending on the type of paint you have used, once the surface is dry it’s a good idea to protect your pour with a sealant. Give it a good once over with a clear sealant then leave to dry.

Finishes

View instructions

Once you are satisfied that your project is completely dry, it’s time to think about optional finishes and reattaching any fittings.

28.Covering_work_surface.jpeg

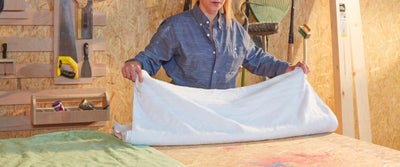
Using gloves, carefully move your project onto a flat surface that’s covered with clean sheets or towels. This soft surface will help prevent the pour from getting any indentations as you reattach the base or legs.

29.Pouredpaint_finishes.jpeg

If the piece is low in height, it’s probably not necessary to finish the underside of the project but the choice is yours. Painting the underside with a block colour is a quick and easy way to tidy any smudges, runs and drips.

30.Coffee_table_renovation.jpeg

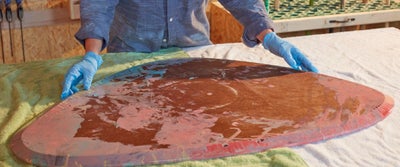
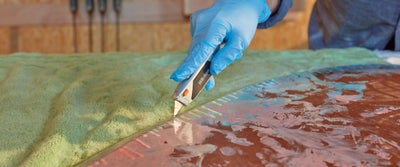
We ran a blade around the edge of the tabletop to remove any large lumps or areas of paint that have waterfalled over the sides. If your paint is still slightly tacky, you can also use a palette knife or cloth to gently press them down.

31.Painting_coffee_table.jpeg

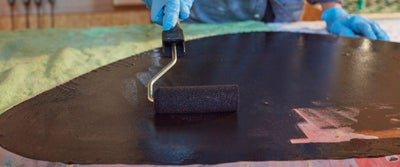
Using a small brush to carefully line the edges, we gave the underside a thin coat of black paint then left it to dry.

32.Screwing_coffee_table.jpeg

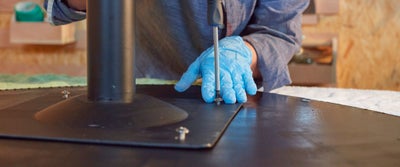
Once the underside was dry, we gave the base a good wipe over then screwed it back on to the underside of the table.

33.Paint_pouring_coffee_table.jpeg

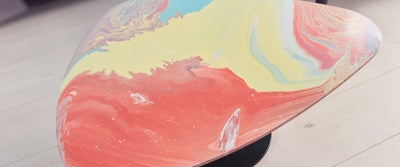
And that’s it! Your paint poured project is now ready to be proudly displayed in your home.

Aftercare

View instructions

If you choose to seal your surface with a varnish or lacquer, it can be a good idea to re-seal the table every year or so. Give the table a gentle wipe down, then respray or seal with a brush.

Get creative with your paint pouring

View instructions

Once you’re confident in paint pouring, there is no end of creativity that you add to your projects.

Try experimenting with different oil-based and water-based paints. Add a few drops of water, oil or silicone-based lubricant to your mix to play with cell formations and patterns.

Get creative with colour. Soft pastel, bold primaries or even metallics, there’s no end of experimenting to be had.

Practice different pours. Two pours using the same method can have a completely different outcome, so it’s a good idea to play around with the techniques and find your favourite.

Try different finishes. Go for a simple tilt and rotate, manipulate your paint using a medium to enhance the design or use tools to create further patterns and cell formations.

Not just for furniture, try pouring on different surfaces, shapes, sizes and textures, including canvases, ornaments, tiles and glass.

Coffee table paint pour inspiration

View instructions
34.Paintpour_finishes.jpeg

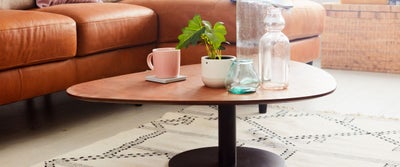
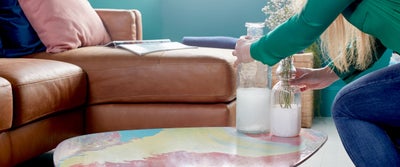
Paint pour on an old coffee table for an instant pop of colour in your living room. A great focal point and fun way to upcycle a piece of furniture rather than replacing it.

35.Paint_pour_coasters.jpeg

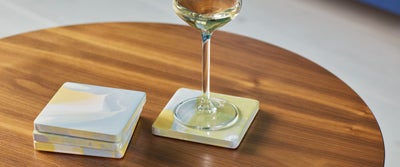
Coasters, table mats and even trays are a great project for paint pouring. Trial techniques and colours for your favourite looks.

36.Ladder_shelf.jpeg

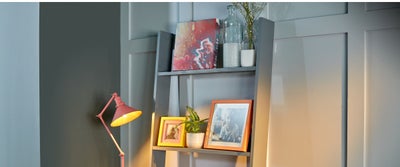
Pouring on canvases is a budget-friendly way to begin experimenting with paint pouring and look great displayed in twos or threes. Start small and work your way up to a gallery-inspired size.

Transform a tired end table with a new design. Accessorise with coasters to match your poured colour scheme.

Have a go at refreshing kitchen chairs or stools. Paint in pastel colours then free pour the seats for exaggerated waterfalling and splashes. Fun, quirky and a welcome splash of colour.

More inspiration from Wickes