How to box in pipes
- Electric tile cutting saw
- Power drill
- Wood drill bit
- Tile drill bit
- Tile drill guide
- Mixing paddle drill bit
- G clamp
- Tape measure
- Pencil and paper
- Spirit level
- Hammer
- Philips screwdriver
- Wall plugs
- Multipurpose screw set
- Mixing bucket
- Adhesive spreading trowel
- Silicone gun
- Silicone finishing tool
- Circular saw
- Grout float
- Boxing in pipes is a technical task that creates a uniform look in your bathroom.
- With the right know-how, basic DIY knowledge and equipment, you’ll be able to do this task all by yourself.
Planning and preparation
- Make sure you have cleared the area for a safe space to work in.
- Ensure you have all the tools, materials and protective equipment on before using tools.
Staying safe
- Always make sure that your power tools are unplugged while you’re setting them up or changing accessories, to ensure your safety.
- Keeping the plug in-sight acts as a visual reminder to prevent accidents and hazards.
- For extra safety when using power tools, be sure to wear protective equipment, including your ear defenders, goggles and a dust mask.
Method
First, take your piece of timber and line it up with the top of your bathroom pipes.

Now take your spirit level and place it on top of your timber to ensure it is level, then draw a line with your pencil above the timber.

Use your tape measure and pencil to mark drilling holes every 30 cm. These markings sit just below the line you’ve drawn.
Once you’ve made your markings, line up your drill guide and lock it into place. Then use your drill with a diamond tile drill bit attached to drill your holes. After that, swap out your drill bit to drill into the wall.
Top tip: to prevent your drill from overheating whilst drilling through tiles, dip the end of the diamond tile drill bit in water.

Now your holes have been made, fit your wall plugs into the holes and use a hammer to secure them into the wall.

Take your timber and place it on top of your support timber, then use a tape measure and make the same markings on the timber so they match up with the holes on your wall.

Replace your tile drill bit with a wood drill bit large enough for the thread of the screw to slip through and drill pilot holes into the markings on the timber.

Bring your timber back to your wall and drill the screws through the timber into the wall so they go into your fixed wall plugs.
Now your timber is secured to your wall, use your spirit level to ensure the timber sits in line with your pipes below.
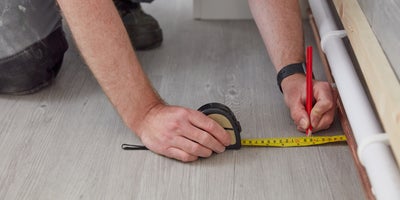
Using a tape measure and pencil, measure from the wall to the desired width of your box (ours is 8cm) and use the baton to draw a line marking where it will sit

Again, mark with a pencil every 30cm on your baton.
Place your second piece of timber and lay it on your support timber. Drill pilot holes into the markings on the second piece of timber.

Screw the timber in place using screws deep enough to screw 1cm or so into the floorboards, to avoid hitting any pipes or wires.

Use your tape measure to measure the distance from the wall to your floor timber and take a note of the measurement. Then, measure the height from the floor to the top of the timber on the wall and take a note of that measurement. You may also need to measure the length of the box as well; our plywood is already the correct length.
Once you’ve got your measurements, it’s now time to setup your circular saw. Ensure you’re in a safe working environment before commencing with the next step.

Lay out your plywood panel and make two pencil markings of the floor to top of the timber measurement you have noted down. Use your spirit level to draw a guideline across them.

Place two pieces of timber down onto your work surface to give clearance under the plywood and to prevent sawing into your workbench. Then place your marked plywood on top of it ready for sawing. Use G clamps to securely lock your plywood to your worktable.

Now use your circular saw to cut down the line you’ve drawn and put the cut plywood to one side for later use.

Repeat the 3 steps above for your top length of plywood.
Head back to your bathroom with your two pieces of freshly sawn plywood.

Using a wood drill bit, drill pilot holes every 15cm or so into the plywood. Then drill screws into the plywood and the bottom timber block.

Now, lay your second piece of plywood on top of the wall timber and drill pilot holes every 15cm or so through the plywood and supporting timber on both sides then screw the top timber piece into place.

With your pipes boxed in with plywood, line your tile up with the front piece of plywood and mark the tile with a pencil, do the same with the top piece of plywood with another tile. Then draw a line across your markings.
Top Tip: Take into consideration the width of the side tile when measuring, so they sit flush with one another when the top tile and trim is in place.
Prepare your Diamond blade wet saw to cut across the lines you’ve just drawn up.

Cut across the line you’ve drawn ready to place on the front plywood plate.

Now, saw across the line on the other tile ready for placing on top of your plywood box.
You can now cut your tile trim to the correct length.
With your two tiles ready for fitting, you now need to prepare your adhesive.
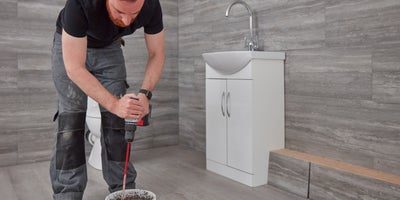
Put your water into a mixing bucket, then attach your mixing drill bit to your drill. Add the adhesive power to the bucket as you go until you hit the right consistency or to the correct measurements on your tile adhesives packaging.
Use an adhesive spreader trowel to scoop your adhesive mixture onto the plywood boxing and spread it to cover the area you are tiling in a thick coat of adhesive. Don’t worry if any excess drips onto your floor or cabinets, as it can be simply wiped away after application.
Top Tip: If you are tiling a large section, it is a good idea to tile in smaller sections.
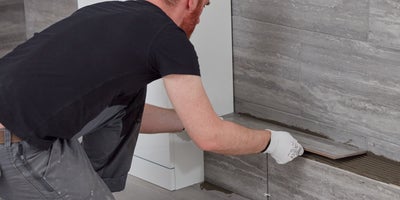
After the mixture has been applied to the plywood boxing, push your cut tiles onto the mixture and press down firmly to keep them in place. Place your Tile trim into the seam between the top and front tile, then place spacers into the seams around the other tiles.

Use a wet sponge to wipe away any excess adhesive.
When you’re happy with your application, leave the adhesive to dry and lock the tiles into place. (Length of time is dependent on the adhesive used).

Once the adhesive has dried, prepare your grout solution by adding the grout powder with water in a mixing bucket to the measurements on your grout packaging. Attach your mixing drill bit to your drill and mix the solution until it has the correct consistency.
Follow the instructions on the packaging to find out how much water and powder needs to be combined.

With your mixed grout solution ready, remove the spacers and apply the grout with a grout float in between the tiles.

Allow this to dry and wipe away any excess solution with a wet sponge and a dry paper towel.

Once the grout has dried, apply a bead of silicone along the edge of the tiles that are against the wall. Use a silicone finishing tool to get a clean finish. Once you’re happy with how it all looks, you’re all done.
