How to Fit a Pedestal Sink and Taps
Fitting a new bathroom sink and taps is a great way to refresh your bathroom, and with the right tools, it’s an achievable DIY project. This guide will show you how to install a ceramic pedestal basin, as well as how to fit the taps, basin waste and trap. Below, you'll find a handy step-by-step guide that will take you through the whole process.
Start by watching the quick how-to video below for an overview, and then follow the instructions for more detail on each step.
Planning & preparation
- Here we will show you how to install a ceramic pedestal basin, as well as how to fit the trap, basin waste and taps
- The fixings you’ll need will depend on the wall type you are fixing to. Bear in mind that the fixings provided tend to only be suitable for solid walls, so if you are fitting to a plasterboard or stud wall then you will require other fixings
- Whilst the pedestal takes most of the weight of the basin, if you are fixing your pedestal basin onto a plasterboard or stud wall and can’t fix directly into a stud, then you may need to install a support board
- Different basin designs may have different fitting requirements, so be sure to always check the manufacturer’s instructions before installing
- Installing a pedestal basin is a relatively straightforward task as long as the existing plumbing does not need to be adjusted too much. However, if the position of the new basin means that plumbing needs to be rerouted, it’s best to contact a qualified plumber
- If you are replacing an existing basin, then consider also replacing the plumbing, as this tends to be visible with a pedestal basin
- Before starting the installation or removing the existing basin, carefully inspect your new basin and check that you have all the necessary parts and fittings
- Always turn off the water supply at the mains before carrying out any plumbing work
Do it right
- Ensure that you are installing your pedestal onto a flat surface
- Take care not to overtighten any fixings as this can damage the ceramic. It’s best to hand-tighten or use a handheld screwdriver to secure fixings
- Carefully measure and mark out fixing holes before drilling
- If you are going to be drilling into tiles, apply insulating foil tape or masking tape to the tile to stop the drill bit from slipping
Staying safe
- Use a cable and pipe detector to check any areas where you plan to drill for hidden pipes and cables
- Wear safety goggles when drilling
- Wear rubber gloves and safety goggles when removing an old basin
Aftercare
- Always use cleaning supplies that are appropriate for your chosen basin to avoid causing any damage
Step-by-Step
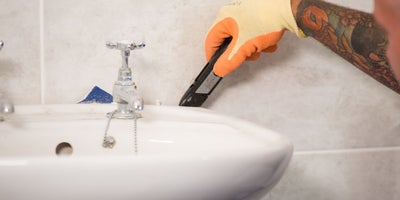
Step 1. Remove the old sink and taps
Before you begin installing your new sink, you’ll need to remove the old one. Start by turning off the water supply using the stopcock, and open the taps to drain any remaining water from the pipes. Once the pipes are drained, disconnect the water supply and waste pipes, taking care to loosen the nuts before fully detaching them. Use a utility knife or a similar tool to cut through any old sealant around the sink, and carefully lift the basin away from the wall. Be mindful of any water left in the basin trap during this process.
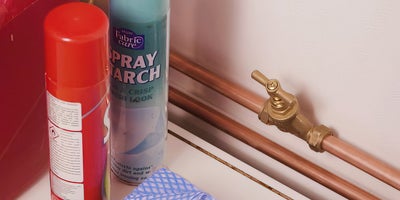
Step 2. Prepare the area
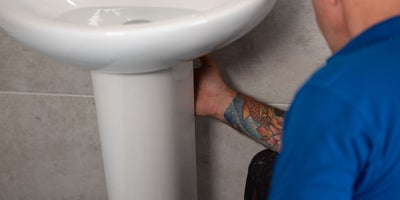
Begin by ensuring the area is clean and free of any old sealant or debris. Place the pedestal in position and sit the basin on top, making sure that it sits flush to the wall. Use a spirit level to check that both the pedestal and basin are level. Once everything is aligned, mark the fixing points for both the basin and pedestal on the wall and floor.
Carefully move the basin and pedestal out of the way and use a pipe, cable, and stud detector to make sure there are no hidden pipes or cables where you plan to drill. If you’re fixing the sink to a stud wall, use the detector to locate the studs. If the studs don’t align with your fixing points, you may need to install a support board.
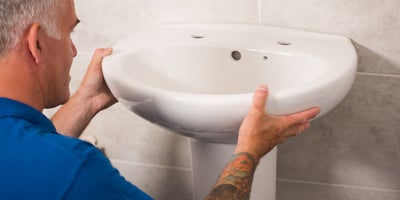
Step 3. Position the sink
Place the pedestal back into position and sit the basin on top, ensuring everything is still level. Use a suitable drill bit for your wall type to create pilot holes at the marked fixing points. If your walls are tiled, apply insulating foil tape or masking tape to stop the drill bit from slipping
After drilling, insert the correct fixings, such as wall plugs for masonry walls or plasterboard fixings for stud walls. Make sure to consult the manufacturer’s instructions for specific fitting requirements. The fixings provided with the sink are usually designed for solid walls, so if you’re fitting to a plasterboard or stud wall you’ll need specialist fittings.
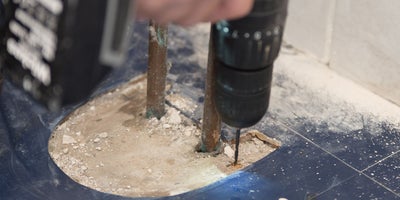
Step 4. Fit the new sink
Once the sink is in place, secure it to the wall and floor with the appropriate fixings, as follows:
Masonry Walls: Ensure the fixing bolts pass through the holes in the back of the basin, then tighten the washers and nuts onto the bolts.
Stud or Plasterboard Walls: Insert and secure a screw on either side of the basin directly into a stud. If you can’t fix directly into a stud, install a support board.
Concrete or Tile Floors: Drill two 8mm holes approximately 40mm deep, then insert wall plugs until they’re flush with the floor. Secure with two 50mm screws into your pre-drilled holes.
Wooden Floors: Drill two 4mm holes around 30mm deep. Secure with 50mm screws.
Be careful not to overtighten the fixings, as this could damage the ceramic. It’s best to hand-tighten them or use a screwdriver to secure fixings.
Step 5. Install the taps
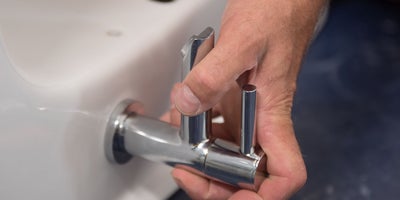
To fit the taps, place them into the pre-drilled holes on the basin and secure them from underneath using a basin wrench. Wrap PTFE tape around the threads of the water supply connectors to create a watertight seal. Attach the flexible tap connectors to the water supply pipes, tightening them by hand first before securing them with an adjustable wrench.
Step 6. Fit the waste trap
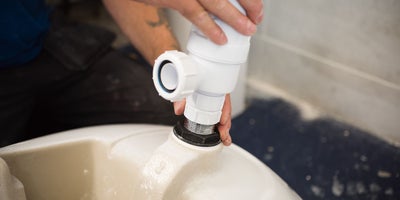
Next, install the basin waste. Apply a small amount of silicone sealant around the washer to ensure a watertight connection. Tighten the nut with an adjustable wrench, taking care not to overtighten. Fit the waste trap, ensuring all washers are properly seated and secure. Secure the washer by tightening the nut with an adjustable wrench or self-grip pliers.
Place the outlet pipe into the waste trap then hand-tighten the the fittings before securing them with a wrench.
Step 7. Test for leaks
Once everything is installed, turn the water supply back on slowly and check for any leaks around the tap connections, waste trap and pipes. Tighten any loose fittings or connections as needed, and ensure that all seals are watertight.
Step 8. Seal around the sink
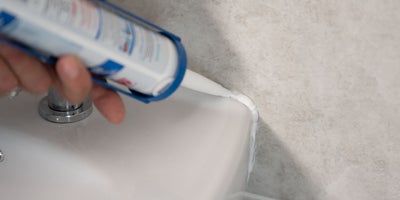
Finally, apply a neat bead of silicone sealant where the basin meets the wall and along the base of the pedestal where it touches the floor. This will create a waterproof seal and help prevent any water from seeping into gaps. Allow the sealant to dry fully before using the sink.
FAQs
If you're still unsure about how to fit your new basin and taps, check out our FAQs for answers to common questions. You'll find helpful tips and solutions to keep your sink running smoothly.
How do I change my bathroom taps?
Changing bathroom taps involves turning off the water supply, disconnecting the old taps, and installing the new ones with flexible connectors. Make sure to wrap PTFE tape around the threads for a secure connection, and always check for leaks once the water is back on.
What’s the best way to avoid leaks when fitting taps?
Using plumber’s tape on all threaded connections is a great way to prevent leaks. Tighten all fittings securely but avoid overtightening, which can damage threads. Always test your connections before sealing up any areas.
Do I need to use silicone sealant when fitting a bathroom sink?
Yes, silicone sealant should be applied around the edge of the sink where it meets the wall or countertop. This prevents water from seeping through and causing damage.
Fitting a new bathroom sink and taps is a manageable DIY task that can make a big difference in your bathroom’s look and functionality. With the right tools, preparation, and some patience, you’ll be able to complete the installation confidently.