Skip to content Skip to navigation menu
Basket
0

Planning & preparation

  • We are going to show you how to make a modular storage unit step by step. Constructed from OSB 3 board, this unit can be configured to your bespoke requirements. We have added flexible accessories including additional shelving, a rail and pegs to store your garage or shed odds and ends.
  • The materials for this project will cost under £100 and will take a DIYer with moderate skill, approximately 5 hours to build.
  • The constructed modular storage will make six boxed units, each measuring 316 x 327 x 1220mm.
  • Modular storage can be made in any shape or size. This unit is designed to optimise large sheet timber, however to make bespoke storage for your spaces, simply adjust the dimensions, quantity of boxes and accessories.
  • Ensure your workbench and power tools are close by for ease of construction.

Doing it right

  • Our step by step instructions and cutting list have been designed as a guideline to build a six box modular storage unit from four sheets of General Purpose OSB 3 Board (11mm x 606mm x 1220mm).
  • We are using OSB 3 board for its versatility and aesthetic, however you could also use plywood or MDF for other applications including internal use.
  • A chop saw or circular saw will ensure that your timber is cut accurately with precision speed. If you don’t have access to power tools, this project can also be completed with a universal saw. Ensure your timber is securely clamped, then slowly cut along your scored line with a clean and sharp saw blade.
  • Once you have chosen a position for your modular storage unit, configure the boxes then secure together with wood screws. We also recommend screwing your boxes to the wall for additional support.
  • We have made wooden jig templates for this construction to aid cutting speed, accuracy and repetition. If you prefer, you can measure, mark and cut as you work, using a tape measure or metal ruler.
  • Watch our top tip videos for our Wickes DIY skills, tips and advice.

Staying safe

  • For safety, we recommend wearing protective goggles and heavy-duty gloves when using a chop saw or drill.
  • Check that your materials are securely clamped to your workbench surface before you begin making any cuts.
  • Inspect the cables and blade of the chop saw and circular saw before they are plugged in, to ensure they are in good condition. If any of the elements need to be replaced, make sure this is done before construction begins.
  • Ensure your construction area is well lit and ventilated.
  • Always check the manufacturer’s label for recommendations before applying any stains, paints or treatments.

Cutting list

View and download the cutting list here

Making the jig templates

View instructions

Begin by making two pairs of jig templates to assist with cutting your modular pieces to size. You will be able to butt these jigs up to your timberboard for fast and precise, repetitive cuts.

1.Measuring_circular_saw.jpeg

With your measuring tape, measure from the outside of your circular saw to the edge of the shoe. This measurement is important when calculating your cuts.

2.Measuring_timber.jpeg

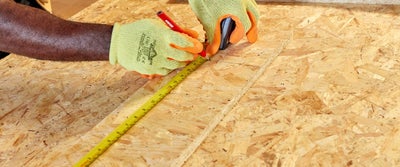
Taking two pieces of scrap timber, measure and mark both scrap lengths to the same width as the longer lengths on the cutting list. This will be 305mm plus the extra measurement from your circular saw.

3.Cutting_timber.jpeg

Repeat this process with two more scrap timber lengths, cutting to the same width as the end and shelf pieces. This will be 267mm plus the extra measurement from your circular saw.

4.Timberboard.jpeg

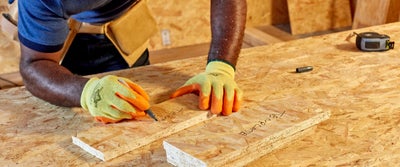
Using your combination square, scribe a line and cut both pairs to size with your chop saw, then label each template with the cut measurements.

Cutting the long side pieces

View instructions
5.timberboard.jpeg

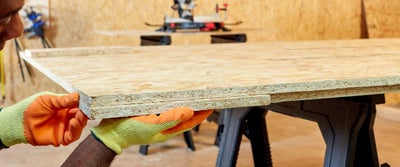
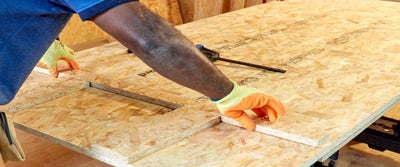
Lay your length of general purpose OSB 3 board on the edge of your workbench. Place the relevant templates on your timberboard and adjust the overhang, to account for cutting with your circular saw.

6.Working_with_timberboards.jpeg

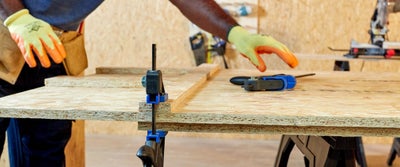
Butt up a long length of offcut timber against your templates and across the OSB 3 sheet. This needs to be at least as long as the width of the sheet or more, to act as a guide rail. Clamp the guide rail, sheet timber and your workbench together using clamps.

7.Cutting_timberboard.jpeg

Checking everything is secure, cut through the timber ensuring that the circular saw shoe is running firmly against the guide rail. This can be quite dusty, so we recommend wearing a dust mask.

8.Timberboard.jpeg

Put the cut length to one side, then unclamp the guide rail and move the timberboard so it’s overhanging the workbench. Using your templates, square up then clamp and repeat the process to cut all of the relevant long side pieces.

Cutting the end pieces

View instructions
9.Timberboard.jpeg

This unit is designed so that the end pieces can be cut from the longer lengths for efficiency. This will leave a small offcut from each length, that can be used to make the accessories.

10.Cutting_timber.jpeg

Laying a length at a time on your workbench and using the second set of templates and the same principles, clamp the guide rail, timber and workbench together. Ensuring the saw shoe follows the guide rail, cut through the timber.

11.preparing_timber.jpeg

Placing your cut end piece to one side, release your clamp a little and slide the timber through so the correct amount of timber is overhanging the workbench in line with your template. Check that everything is square and true then tighten up the clamps again.

12.Working_with_timberboard.jpeg

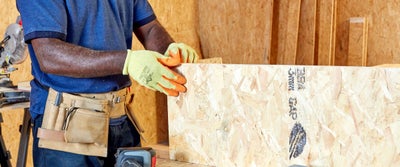
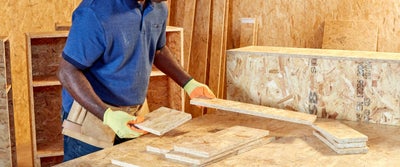
Once all the relevant pieces have been cut, stack them neatly at the end of your workbench.

Screwing the cut pieces together

View instructions
13.Screwing_timberboard.jpeg

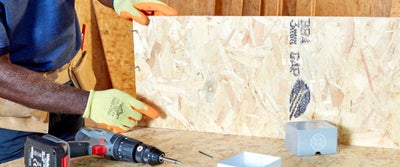
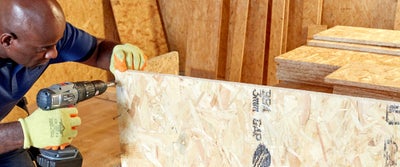
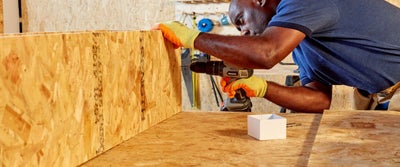
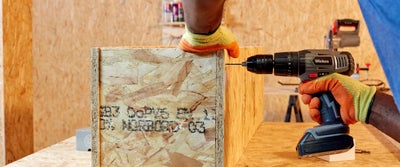
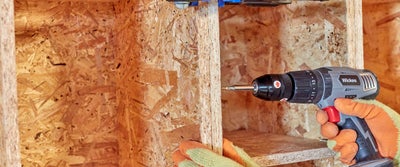
This structure is put together using butt joints. Holding the first long length and end piece in place at a 90 degree angle, drill 3 pilot holes through the long length and into the shorter length, ensuring that they align.

14.Screwing_timberboard.jpeg

Change the drill bit to a driver bit and then place a screw into each of the pilot holes, twisting them in a small way by hand.

15.Drilling_timberboard.jpeg

Holding the long and end pieces firmly in place at a 90 degree angle, screw the pieces together ensuring the screw head is sunken into the material, just enough so it’s flush to the surface.

16.Drilling_timberboard.jpeg

Bring in the next long side length to your workbench and repeat the process, drilling pilot holes and then firmly securing with screws.

17.Drilling_timberboard.jpeg

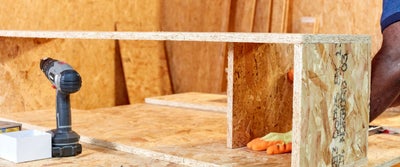
To complete the first box structure, slot in the last end piece and secure with the same process.

Adding a storage shelf

View instructions
18.Measuring_timberboard.jpeg

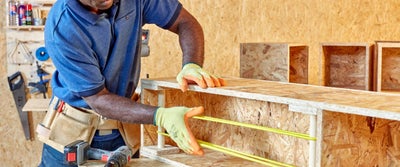
Measure 30cm from the end of one of the long lengths with your combination square and make a pencil mark on the edge of the material. Repeat this for the parallel length then rotate the cabinet over and repeat on the opposite side, so there are four marks.

19.Assembling_timberboard.jpeg

Slide-in another end piece to the structure so the base of the timber is aligned to the four marks, making a shelf.

20.Drilling_timberboard.jpeg

Using your drill and ensuring you are working at a 90 degree angle, make several pilot holes through the long side piece and into the shelf on either side. Secure with wood screws ensuring the heads are sunken into the material.

21.Measuring_timberboard.jpeg

If you wish to add another shelf, rotate the cabinet and repeat at the other end of the box.

Assembling the modules

View instructions
22.Assembling_module_board.jpeg

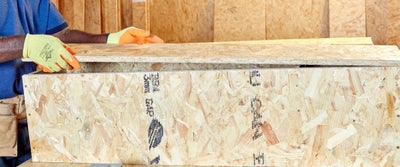
Placing your box face side down on your workbench, lay another long length on top of the structure.

23.Assembling_module_board.jpeg

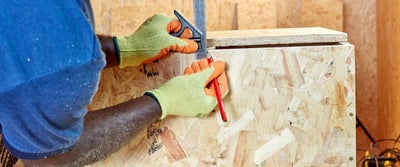
If you have fixed a shelf or shelves in place, use your combination square to scribe a central line on the long length to indicate where the shelf is underneath. This will help ensure the pilot holes go through the back length and into the shelf timber.


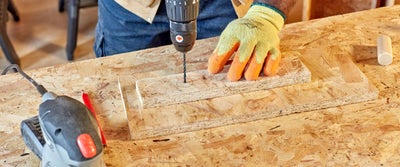
24.Drilling_timberboard.jpeg

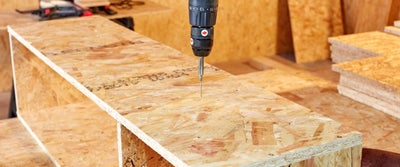
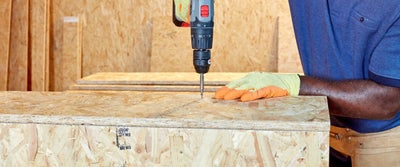
Drill a pilot hole 9mm from each edge on the central line, down through the timber and into the shelf at a 90 degree angle, then secure both holes with screws.

25.Drilling_timberboard.jpeg

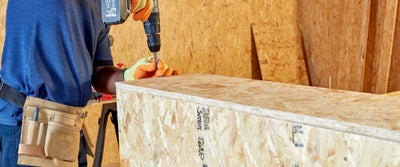
Repeat this process to secure the remainder of the back piece to the long lengths and end pieces to complete the first module.

26.Sanding_timberboard.jpeg

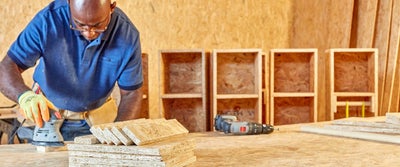
Using a palm sander and 120 grit sandpaper, give the module a good sand to remove any sharp or frayed edges, then set aside.

27.Assembling_modulboard.jpeg

Repeat this process with or without the shelves to create as many modules as you require for your bespoke storage unit. Our design and cutting list will make six modules with a small amount of offcut timber that can then be used to accessorise.

Customising with rails

View instructions
28.Handling_timber.jpeg

To make a handy rail, gather your OSB 3 offcuts or scrap timber and begin by chopping the brackets.

29.Cutting_timber.jpeg

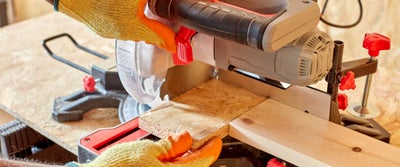
Lay your chosen timber offcut against the chop saw blade, then create a stop block by lining up another piece of timber to the saw fence and clamping it in place. Rotate your original offcut by 90 degrees then butt it up against the chop block, cutting through your timber to create a perfect square at speed. Repeat to create as many brackets as you need.

30.Measuring_timber.jpeg

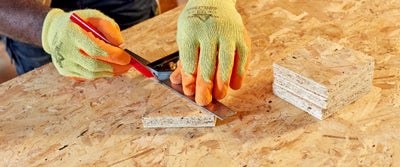
Using your combination square, scribe a line diagonally across each square from corner to corner rotating to create a cross, then mark the centre of each piece. Make a small hole with a bradawl or sharp tool to help guide your drill.

31.Drilling_timber.jpeg

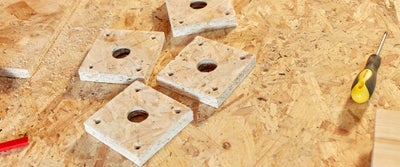
Clamp the first square to your workbench on an offcut piece of timber. Using a hole saw that matches the diameter of your dowel rail and a 90 degree drilling jig, drill down into the mark until you hit the offcut timber. Repeat for each square.

32.Customising_modular_storage.jpeg

Use your tape measure or a small offcut and make a mark in the corner of each square to create pilot holes. Drill through each then finish with a countersink, repeating for each square. Finish with a quick sand with your palm sander to neaten up any rough edges.

33.Assembling_modular_storage.jpeg

Offer up a length of light hardwood moulding to one of your units and make a small line to mark the internal width of the cabinet. Using your chop saw, cut the dowel to length then insert each end through a square bracket.

34.Assembling_modular_storage.jpeg

Insert the dowel and brackets into position inside your chosen module. Square up the brackets and then screw through the holes into the longer side lengths, so the head of the screws are sunken.

35.Assembling_modular_storage.jpeg

Repeat at the other end of the module to create an enclosed space that can be fastened with bungees or rope.

Customising with coat pegs

View instructions
36.Sanding_timber.jpeg

To make wooden pegs to hang coats or bags, cut your wooden dowel to your chosen length. Remove any rough or frayed edges with your palm sander, adding a small decorative bezel to one end.

37.Sanding_timber.jpeg

Choosing a small piece of offcut timber as a bracket, cut to length with your chop saw to fit the width or depth of one of your modules. Give it a quick sand to remove any rough or frayed edges.

38.Measuring_dowels.jpeg

Holding the lengths of dowel in place on the bracket, scribe a line around the base of each.

39.Drilling_timber.jpeg

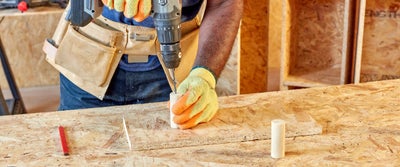
Drill a pilot hole into the centre of each marking, finishing with a quick sand and a countersink hole to the back of the offcut.

40.Drilling_timber.jpeg

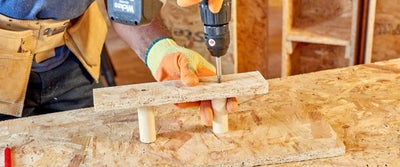
With a screw, make a small mark through the bracket hole into the centre of each dowel, then drill a small pilot hole into each. This will help prevent splitting when screwing.

41.Drilling_timber..jpeg

Secure each dowel to the offcut, twisting the screw by hand then tightening up with your drill. Finish by drilling a pilot hole and a countersink at each end of the offcut bracket, ready for mounting.

42.Sanding_wood.jpeg

Using the above methods, the customisation options are endless. Make additional coat pegs and rails in different sizes and add more offcut brackets and shelves at varying intervals.

Assembling and screwing your modules to the wall

View instructions
43.Assembling_modular_storage_to_wall.jpeg

Once the construction is complete and you are happy with your customised accessories and additional storage, stack the modules in your chosen configuration to create your bespoke storage unit.

44.Drilling_timber.jpeg

To secure the units, screw through the module lengths to connect the units, adding extra screws through the back pieces into the surface behind.

45.Modular_wall_storage.jpeg

And that’s it, your bespoke storage is complete!

Aftercare

View instructions

For a perfect finish, give your modular boxes a good sand down between stages to remove any rough or frayed timber edges.

Depending on the timber you use, you can even get creative with oils, varnishes, paints and stains to suit your style and space.

If your storage requirements change or you fancy a freshen up, simply unscrew the modules and reconfigure the arrangement.

Get creative with your modular storage unit

View instructions

Providing storage to suit the sizes, shapes, styles and rooms of your home, bespoke storage offers flexibility that is customisable, transportable and durable, with infinite uses and configurations.

Whether you need a slimline unit to fit under the stairs, a compact solution for a utility room or a full wall of shelving for your garage, completely customise the design to suit your spaces. Simply amend the cutting list plans to create your perfect design.

Use different types of wood to suit your style and decor. OSB 3 board, plywood, timberboard and MDF all work well as durable and affordable options.

Experiment with different finishes to enhance the timber you choose. Try painting shuttering ply with gold paint for a luxurious texture or match the unit colour to the wall behind, for a trendy finish.

Make additional shelving, rails and pegs for endless storage possibilities in any area of your home. Create longer dowel pegs to layer hanging items, add subsection dividers to house paint pots and tester samples, and add partitions to store magazines, papers and books.

Add further modular units as your storage needs grow, simply screwing them into place for a truly flexible solution.

Get the most out of your flexible storage. Add chunky locking caster wheels and a handle to light and small units, for an essential gardening or quick tool station. Simply slide the module back into place and lock the wheels once you’re complete.

46.Modular_storage.jpeg

Modular storage inspiration

View instructions

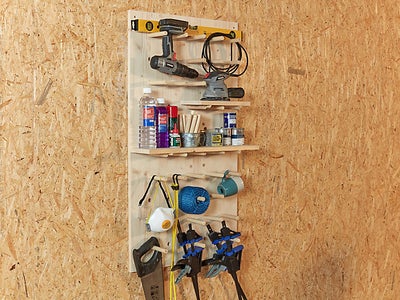
Create bespoke storage for your workshop to tidy away your tools, timber, paint tins and materials. Great for keeping offcuts, boxed electricals and bulky tools off the floor for more workable space.

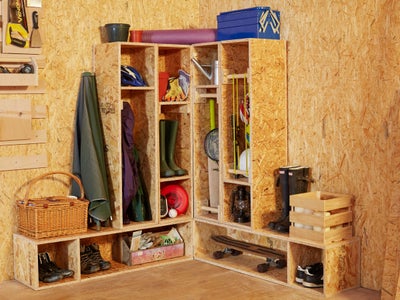
Fill your custom unit with garage odds and ends from your picnic hamper and blanket to garden games, sporting activities, logs, helmets and pumps.

Stack your modules horizontally to create handy shelving for shoes, books or pantry goods. Adjust the size of the modules to fit compact spaces, alcoves and small pantry larders.

Go vertical and add rails, bungee cords and extra shelves to store your sports rackets, bats, balls, wellies, coats and garden accessories.

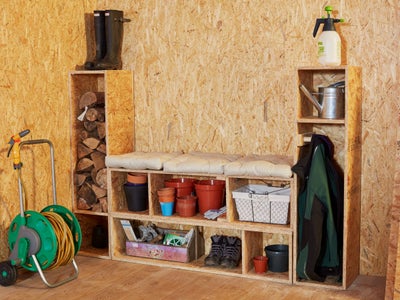
Get creative with the configurations and stack the modules to create a comfy bench seat for pulling on your wellies and boots. Fill the modular units with pots, bags of soil, bulbs, seeds, small hand tools and your lawn sprinkler.

For more storage inspiration and ways to utilise space in your home, visit our ideas and advice hub.

47.Modular_storage.jpeg

More inspiration from Wickes